The Complete Guide on How to Check and Change Your Car’s Oil

The goal is to keep your vehicle running when it is on the road. Obvious right?
At the same time, we believe you should also understand more with regards to the inner workings of your car.
Whether you are a new car owner or you have been driving for quite some time now, there is one thing all drivers should learn. Hint: It’s not about how to change a spare tyre.
It is none other than knowing how to perform a car oil change.
This particular job may seem like a thing that you go to a mechanic for every once in a while.
In this blog article, we discuss all the fine details in relation to oil types, precations and even regulations and explain the most effective way to change out your car oil.
However, knowing how to change car oil is basic knowledge that every driver should possess.
After all, it is what keeps you and your car on the road and means you are less likely to call a towing company like ours!
Even though we are always happy to help.
How Do I Choose the Right Oil?
Before you can get comfortable into learning how to change your car’s oil, it is necessary to know how to select the correct oil. It is an important detail that not all drivers think about until they end up buying the oil themselves.
You may have guessed it; the answer lies in your vehicle. Many motor oil options are around, which makes it a daunting task to choose the right oil for your car. However, it should not be as difficult as it may seem.
The first step is to read the car owner’s manual. The booklet should have all the specifics you need form the recommended oil type to weight to thickness.
Many car owners do not make the correct decisions when it comes to choosing the oil for their engine. The truth is it is the lifeblood of the car. Oil has several essential functions, including keeping the vehicle cool and stopping it from friction. With the right type of oil, your car, particularly its engine, will have a longer life. Plus, it can also contribute to fuel economy.
Before rushing to buy, here are some technical specifications that you should first know about:
-
Type of Oil
There are three main types of oil, namely:
- Mineral or Conventional: This type comes from crude oil that has been processed. It is typically the cheapest that you can purchase at auto shops. Most products adhere to Australian standards. However, you should not expect to get additive packages from them. Conventional oil is still the right choice, especially for owners who want to change oil frequently. It is also great for those who have low-mile engines.
- The Premium Form of Conventional Oil: For new cars, this type of oil is highly recommended. Many brands offer products in different viscosities, particularly those that cover almost all light-duty vehicles. The numbers can change as engines come with more precise requirements.
- Full-synthetic: For high-tech engines, this type of oil is the best. Look at the label and make sure that it has passed the stringent tests. Its label should indicate that the oil is superior and offers long-lasting performance while on the road. Full synthetic oil flows better even at low temperatures and can remain at its peak lubrication even at high temperatures. Note, however, that this type of oil is the most expensive out of the options. It does not have any traces of mineral oil.
- Semi-synthetic: Also known as a synthetic blend, this type is a combination of mineral (conventional) and synthetic. If you use this type of oil, you cannot utilise mineral oil, but you can switch to synthetic oil anytime. In essence, a synthetic blend is premium conventional with a hint of artificial. The formulation offers superior protection, which is why it is a better choice for vehicles that take heavier loads and higher temperatures. Owners who benefit from this type are those with pickup and SUV.
- High-mileage: Most vehicles have at least 120,700 kilometres on their odometer. Due to this detail, oil laboratories created oils that cater to this market. They add seal conditioners to increase the internal engine seal’s flexibility without affecting other parts.
You may need to consult your car owner’s manual to determine the type of oil that the manufacturer recommends.
-
Viscosity
Fundamentally, the oil’s viscosity determines its flow resistance. It is mostly labelled in number form, such as “25W-50” the five stands for the oil flow at -17.8 degrees Celsius.
Many people mistake the letter W to stand for weight, but it is, in fact, for winter. It means that the oil will still flow properly when cold. Look for a lower number, which indicates that it is a rare type of oil. Thinner oils flow easier than thicker ones during the cold season.
On the other hand, “50” indicates the viscosity of the oil measured at 100 degrees Celsius. It is a representation of its resistance to thinning when exposed to high temperatures. In the example, the 25W-50 oil will thin out slower than 25W-30 oil.
Always consult the owner’s manual, which will give you the best advice regarding the correct range of viscosity to choose for your vehicle.
-
Additives
One thing that you have to be aware of is that the car oil you will buy is not just made up of oil alone. It also contains other chemicals, minerals, and other additives. This way, it will work when put in the car engine.
There are high-mileage oil options where companies would add more anti-wear agents compared to traditional oil. Others also come with seal conditioners, corrosion inhibitors, and other additives to keep engines running for a more extended period.
Companies may also add elements that can modify viscosity, which will help in thickening the oil. There may be detergents as well, which aid in removing deposits. However, this additive may not be wise for use during warm periods and can contribute to rust and corrosion.
With all the things above in mind, it is time to shop for the oil your car needs. Often, drivers choose to follow the three-month, 3,000-mile rule (equivalent to 4,828 kilometres.) Others go for the four-month practice, which is also beneficial for some vehicles.
Changing oil regularly or every three or four months lowers the need for other types of oil. Instead, the car owner can stick to conventional oil.However, there are car companies that suggest owners use synthetic oil only. Before choosing and buying, make sure that you have already read the car’s manual. It will tell you the type of oil to go for.
As a rule of thumb, you should not switch between different types of oil. Therefore, if you have already used conventional, you should not change to synthetic oil or vice versa.
The main question here is: which oil should you go for? If you look at the shelves at auto parts shops, you will see oils that are designed for various purposes. Some are for high-performance cars, new engines, off-road vehicles, and high-mileage cars.
As mentioned, the best way to know is to read the owner’s manual. It will tell you what the manufacturer of the car recommends. Some vehicles may refer to oils that offer energy conservation, which means that the product has passed a lab test.
To make it easier for you, here are some guidelines on which oil type to opt for:
- If you have a new car, you may choose premium conventional oil unless your car manufacturer states otherwise.
- If your car sports a high-tech engine, choose a full synthetic type.
- For drivers of SUVs and pickup trucks that require protection against high loads, a synthetic blend is a better option. Plus, they are less expensive.
For older cars, including light trucks and SUVs with more mileage, you may need more oil than newer cars. The reason behind the increased oil requirement is that the crankshaft seals may not be as flexible as once they have been. They may have hardened, and some have cracks, causing leakage at low temperatures.
In this case, a high mileage option may be the best choice because of the seal conditioners they contain. The additive can flow right into the seals’ pores, allowing the restoration of their shape and closing of the cracks.
Australian Rules and Safety Requirements
Engine oils that are currently sold in Australia are all covered by the following classification systems:
-
Society of Automotive Engineers or SAE
The SAE has a viscosity code, which mainly targets the multigrade oils since monograde ones are no longer that popular. Multigrade is immensely favoured in Australia, as well as in other parts of the world because it spans a wide range in viscosity. As discussed above, it comes in a number format with W in it, such as 10W-30.
Oil is measured at temperatures, and the SAE graded them according to the temperature range. To guide you, here is a look at how the grades go:
- 0W can properly flow even at a temperature of -30 degrees Celsius
- 5W flows up to -25 degrees Celsius
- 10W flows properly up to -20 degrees Celsius
- 15W flows up to -15 degrees Celsius
In short, if the oil is 25W-50, it is a 25-weight oil when exposed to cold weather. It will not go thinner than a 30-weight oil at high temperatures. It will keep flowing like 25-weight oil even at -5 degrees Celsius and like 50-weight oil when the temperature is at 100 degrees Celsius.
-
American Petroleum Institute or API
The API is a service classification that identifies the quality of oil for vehicles that are either diesel or petrol powered. The certification symbol shows that a certain product has met the service standards that the API has set. The current categories include:
- SJ, which is used for 2001 engines and older
- SL for 2004 and older
- SM for 2010 and older
- SN for 2011 and older engines
Diesel engines are categorised as CH-4, CI-4, and CJ-4, which are the only existing classifications.
-
Association des Constructeurs Europeens d’Automobiles (ACEA)
The ACEA, often translated to European Automobile Manufacturers’ Association, is the equivalent of API. The ratings from the ACEA consist of the class of oil, which are:
- A/B for oils designed for cars that carry passengers
- C for motor oils compatible with catalysts
- E for heavy-duty engine oils (mostly diesel)
The classes are also divided into categories that the ACEA has rated from one to nine.
The Australian Government, particularly the Department of the Environment and Energy, has implemented a standard known as the Fuel Standard Determination. It started in 2001 but will end on October 2019. The Fuel Quality Standards Determination 2019 will take its place.
The standards mentioned set the parameters and methods for testing diesel oil. They determine the national standards for different parameters, such as sulphur, ash, biodiesel, and polyaromatic hydrocarbons, among others.
How to Change Car Oil on Your Own
Changing car oil is one of the most important maintenance jobs that you will have to perform regularly as a vehicle owner. The process can get dirty, but you can save money if you know how to carry out the task on your own. Additionally, you will help extend your car’s life by several more kilometres.
The good news is changing oil is not comparable to brain surgery at all. You may have even done it a few years back, especially when your car was still new. Whether you are a complete beginner or you have experience in changing car oil, here are the steps to follow in performing the task:
Step 1: Read the Owner’s Manual of Your Car.
Before heading off to the auto shop, you should always consult the owner’s manual first. It will help you determine the correct oil weight and type for your vehicle. Make sure that you go with the recommendations of the manufacturer. The most important is to follow what it says about the oil viscosity.
If you have an older car, it is even more essential that you stick to the carmaker’s advice. The engines typically depend on oil pressure when it comes to regulating the timing of the valve. Oil pressure also dictates the application of tension to the chain or belt. Therefore, you cannot substitute the recommendations for something that you prefer. It will not just cause damage but will also result in poor performance. You can also get a warning saying “Check Engine.”
Step 2: Get the Needed Tools and Materials.
Now that you have your motor oil ready, you should prepare the tools required for the process. You need the following:
- Box end wrench
- Pan for catching oil
- Funnel
- Jack or ramps
- Towels or rags
- Safety glasses
- Rubber mallet
- Oil filter
- Oil filter gasket
- Oil filter wrench
- Container for the old oil
If you do not have a box end wrench, you can utilise a socket set with ratchet instead.
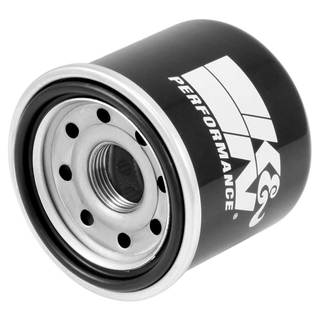
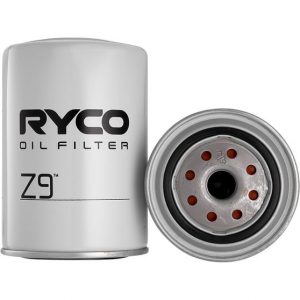
The performance of an economy filter and a high-quality one are not the same at all. However, the price difference is barely noticeable. Therefore, you should opt for a top-of-the-line version unless you only use conventional oil and you will change every 4,800+ km. Ryco oil filters and K&N oil filters are popular but you need to make sure they service the brand and model of your vehicle. Using an oil filter wrench may also be required if it is hard to twist and loosen.
Step 3: Park Your Car.
Make sure that you have parked your car on a flat and even surface. If you have a truck or SUV, you can easily crawl under the vehicle without needing other pieces of equipment. However, if you have another type of car, you will generally require a jack and jack stands. You should never forget to activate the parking brake to prevent it from moving anywhere.
Step 4: Open the Vehicle’s Hood.
Locate the hood release, which is typically on the left side of the footwell.
Step 5: Get Some Tools, Namely the Wrench and Catch Pan.
Once you have the necessary tools for the next step, you can crawl under your car.
Step 6: Locate the Oil Pan of Your Car.
If you do not know where your oil pan is, it is generally about 0.61 to 0.91 metre from the front of the vehicle. To be sure, you will need to check the manual of your car to know the exact location. Once you have found it, look for the bolt next. It is what is known as the oil drain plug bolt, which is near the bottom of the oil pan.
Step 7: Get Ready With Your Oil Catch Pan.
Set the pan under the drain plug before you loosen it using the socket or wrench that you have. You should not completely take it off. Use your hand to remove the plug carefully. Note that the oil may be extremely hot, so be cautious with this step. Let the old oil drain and wait for the engine to be complete oil-free, which should take several minutes.
Step 8: Clean the Plug.
After you have drained the old oil out, use the rag to wipe the drain plug and the oil pan.
Step 9: Replace the Plug.
Once clean, reinstall the drain plug back into the oil pan. Use your hand first and not the wrench or socket, which will help prevent cross-threading. Tighten it afterwards using the wrench. Over-tightening should be avoided since it can strip the drain pan’s threads.
Step 10: Find the Oil Filter.
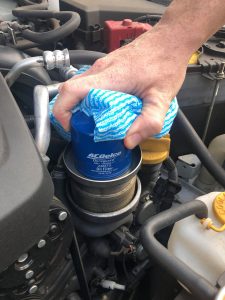
If you have already changed your car oil before, you will know the location of the filter. If not, you can check your owner’s manual. Position the oil catch pan once again under the filter and make sure it is at the right spot so as not to spill any oil. Then, remove the filter, which may need some cleaning. If you cannot take it off, you may need a filter wrench and a new filter.
Rub a bit of new oil around the oil filter gasket (the new one). This way, it will sit smoothly and stay sealed. Install the new filer using your hand and be sure not to over-tighten.
Step 11: Find the Oil Fill Cap.
Get your engine oil first and then look for the dipstick. It should be raised by about five centimetres. This particular method is not required, but it helps drain the old oil faster for later.
As you fill it up, make sure that you never go beyond the top line on the dipstick. Use a funnel for easier pouring.
Overfilling is not a good idea and will never be – even if you have a problematic engine that burns oil or leaks. You may find that topping off is tiring, but you cannot go above the dipstick line. Otherwise, it will hurt your engine badly.
Running an engine that you have overfilled will cause extreme consumption of oil, which can quickly damage the catalytic converter. If it is destroyed, it will cost you at least a thousand for repair.
Step 12: Replace the Oil Fill Cap.
After putting the cap back on, you can seat the dipstick that you moved earlier.
Step 13: Check for Leaks.
Start the engine and make sure that there are no oil leaks. Pay close attention to both the filter and drain plug. There should be no visible leaks. If you find any, turn off the engine and repair the oil leaks. Recheck to ensure the oil does not drip anymore.
Step 14: Finish the Process.
Shut off the engine now, letting the oil settle. Once again, it may be necessary to keep inspecting if there are leaks. Lower the vehicle to the ground if you had to raise it at the beginning of the process.
Clean up, and you can start driving your car right away. You can record the date and the number of kilometres, so you know when to change the oil next.

